At Windsurfing Direct we take great pride in making sure our customers receive the best serivce possible - both before and after purchasing. Below you will find everything you need to know about setting up your new board or windsurfing package all the way from accpeting the shipment to attaching your sail to your board and hitting the water. However, as a Windsurfing Direct customer your access to our industry leading customer service is only an email or phone call away if a question you have isn't anserwed in the information below.
Signing for your Shipment
If you have a board or complete package on the way, you have already read, agreed, and replied to our shipping terms. It is very important that you take the time to inspect your shipment before signing for it. Shipping damage is rare, and we pack our items exceptionally well. However, before signing for your shipment as "clear" or "in good condition" take a few seconds to be sure it is as once you have signed for it, you own it. Once you have signed for it - there is very little Windsurfing Direct can do to assist in a damage claim. We generally suggest that even after inspection that the shipment be signed for as "damage suspected - pending inspection" so that if any further inspection damage is found action can be taken. Board boxes are big - and as you can see below are well built, and what is inside them is well wrapped.


The delivering driver (or the dock attendant if you are picking up) will be helpful in assisting you if you feel something may be damaged. However a couple of things to bear in mind while accepting your shipment:
- the boxes can look as though they are heavily damaged and the contents are perfectly fine. This is exactly the point of the large boxes and bubble wrap inside - so do not base your inspection only on a damaged box. Boards that are refused and are not actually damaged will be subject to shipping costs.
- for cosmetic damage (i.e. a scratch), please use your discretion. Many customers are so glad to have their new board, and realize they are likely toi scratch it anyway the first time sailing, and choose to not worry about it. Others are handy in board repair and will often accept shipments knowing they have to do a little repair. In this case we ask that you sign for the board as damaged, and supply us with digital pictures so that we can file a claim on your behalf. In these cases, whatever settlement we receive from the freight company is passed back to you. Best to contact Windsurfing Direct in cases such as this to discuss before proceeding with signing for a damaged board.
Unpacking your ShipmentLikely you are going to tear into your package like a kid at Christmas - but we do have the following suggestions
- go slow when using sharp blades. Sail bags, sails, harnesses, and other items can easily be cut when opening the boxes. As well, some brands use rather large staples to seal the boxes - so watch out for those.

- Check to make sure everything you ordered has arrived - contact us if items are missing. We sometimes ship items directly from the manufacturer to you - likely your sales person informed you of that, or your packing slip has a note regarding this.
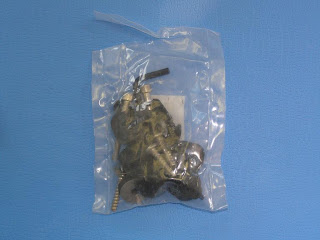
- watch what you throw out - in board shipments especially small items like the vent screw, foot straps, and foot straps screws can be in less than obvious places in the boxes. If you are missing something double check all the packaging material - likely you will find it.
Installing your Vent Screw
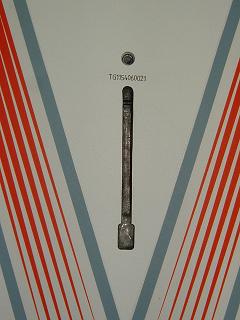
If your board has a small threaded hole either in front of or behind the mast track – the first thing you want to do once unpacked is locate the vent screw and install it. Boards are produced under a lot of pressure in a vacuum production process, and this hole is used to allow the air to escape. However, before sailing this vent must be plugged with the vent screw to make sure water doesn’t get in and ruin your board.

Installing your Fin
At the tail of the board will be one or two holes overtop of the fin box that which is where you will insert your fin. In the hardware package that is with the board you will find metric threaded stainless steel screws, and likely a couple of stainless washers, as well as rubber washers. Looking down from the top of the board you would see the head of the fin screw, the stainless washer, the rubber wash (a buffer between the stainless washer and the board, and then the board. The fin inserts from the bottom of the board - which you then screw in until hand tight.


Some brands to use different sytles of screws - namely Bic boards have an allen key adjustment system with the allen key provided. Fanatic uses a "QuickLock" fin screw on some of their models that is a black handle on the end of the screw for tool-less adjustment. This is usually located in the board for shipping.
Installing your Daggerboard/Centerfin
The bottom of all boards have fin slots, and if you have a slot in the middle as well, then you have a daggerboard or centerfin that needs to be installed. The top board top of the picture below has a centerfin, the bottom has a dagger board.
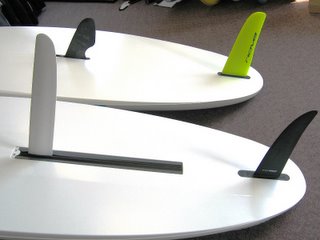
More than likely your centerfin slot has a plug in it when it comes out of the box. Using the provided allen key (usually with the centerfin) unscrew the screw and pull up on the plug at the end where the screw came out of. You will see that the plug is achored into the slot by a pin on the plug that is in a track that runs the length of the slot. If you pull the plug towards the same end that the screw came out of it will slide forward and then pull out of the slot. To install the centerfin, simply reverse this and you will have the centerfin installed.
Daggerboards generally come with the only assembly needing being to insert the daggeboard into the slot, however the Bic Techno 293, Core 293, and 293OD are sometimes exceptions. The diagram to install the daggerboard is below - just be sure to fully lock in the daggerboard housing once installed.

The initial adjustment of the daggerboar may seem stiff - however, once you have sailed the board a few times it will become much easier.
Installing your Foot strapsIf you are just learning, best to not put the straps on at all for the first few outings as they are an added obstacle to trip over while learning.
Each brand of board is somewhat different - however you should have 4 straps, 8 screws, and a variety of strange looking plastic washers that make up the anti-twist system for the footstraps. The explanation below is with Bic Straps, however most other brands are very similar to installl. Make sure you have all the parts as seen below.
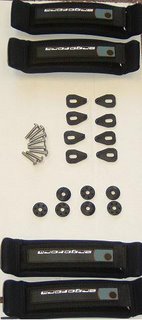
Click on the picture below to get an explanation of setting your straps in the various settings that are available. The biggest thing to keep in mind is only screw the straps where there are holes in the board - as these areas are re-inforced with inserts specifically for screwing into. You can screw in and out of these as much as you want, and no need to plug them when not in use.
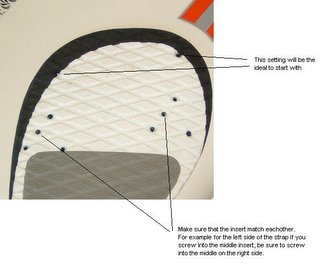
The anti-twist system is optional - and uses one of the holes opposite to where you are screwing in the strap screw.

You will also have a rounded washer (or an oval stainless steel washer) that goes on the screw. When looking from the top down you should see the screw head, the washer, and then the footstrap.
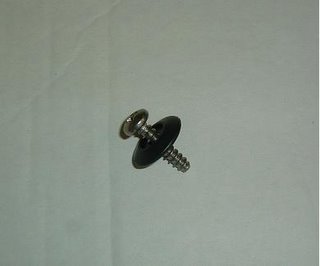
Set your screw in the middle option on the strap. Although it looks like you need more than one screw per end, all you need is one (which is why there are only 8 screws provided). Select your strap placement location, being symetrical on both sides of the board, and screw in hand tight.
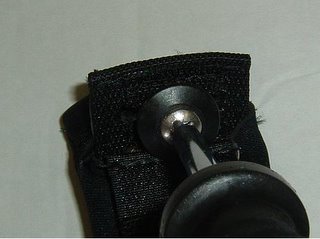
When you are done, your straps should look like this. Use the velcro staps on the top of the board to adjust them to fit your feet. You only want your feet in the straps far enough so that you can curl your toes up on the other side. Any further and you risk not coming out in a crash.

Rigging your sail
Each sail is different - this is a general guide with a list of brand/model specific links at the bottom of this section. We do suggest visiting the website of your sail brand (links below) and viewing the rigging guide speficically for your model for the exact rigging and tuning.
All sails will have a list of specifications like the picture below, located either on the sail bag or the sail foot (or both)

Roll out the sail on the ground, and then insert the top section of the mast into the mast sleeve and start to push it up the mast sleeve. Then attach the bottom section of the mast to the top - being careful to make sure the top and bottom and sections are fully connected.
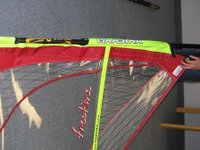
Slide the mast all the way to the top of the mast sleeve - best to use a hand over hand motion as you slowly slide it up the mast sleeve.
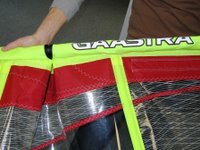
The luff length of your sail is the length of the mast + the mast base extension needed. Somewhere on the sail or sail bag will be printed a luff length, and likely what to set your base extnesion to. If no base extension number is given, simply subtract the mast length you have from the luff length, and that tells you what to set you mast extension to. If the luff length is less than your mast length - you will adjust the head of the sail with the pre-installed head adjustment. Set your mast base extension to the length you need and insert it into the base of the mast.

To set the downhaul of the sail, thread your mast base lines through the bottom of the sail as shown below. Some sails have built in pulleys, so only have stainless steel grommets, however the line threading is the same

When properly downhauled the foot of the sail should be within an inch of the mast base extension. This may seem hard and you may think you are going to break the mast - but to get the proper performance out of the sail you need the proper amount of downhaul tension.
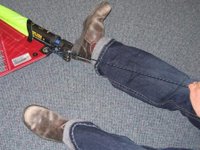
Similar to the mast base extension settings, the sail will also have a boom length setting. Set you boom to this length - a good rule of thumb is that you should have about 2-3 inches of space between the inside of the tail of the boom and the end of the sail before outhaul tension is applied.
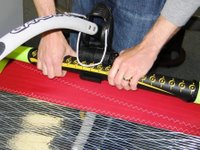

Set your outhaul tension pulling the end of the sail flush with the end of the boom.
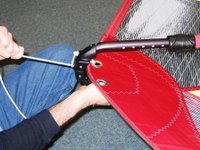
For more in-depth rigging, please visit:
Gaastra Sails
Sailworks Sails
Severne Sails
Attaching your uphaul
To pull up the sail you need to attche the uphaul. To attach it to the boom head, follow the diagram below. Once you sail is fully rigged (the last step before you connect it to the board), stretch the uphaul from the boom towards your mast base and loop the other end of the uphaul around the mast base at the foot of your sail.

 Attaching your Mast Foot
The video below shows how to put your base on the board. All that is needed is for it to be tightened hand tight and in the middle of the mast track.
Attaching your Rigged Sail to your BoardOnce you have your mast foot attached to your board, and your mast base is on your rigged sail the last step is to connect the two. Some prefer to do this on land and carry both together into the water, some prefer to assembler them in the water. If you opt to assememle them in the water - take the sail into the water first as the baord will drift away.
Line up the stainless buttons on the foot with the holes in the base and connect the two. Be sure to hear them click and the buttons should stick out through the holes when properly connected. To take the two apart, simply do the reverse.

 There's something very satisfying about giving back to your community or simply just giving back however you can through donation or volunteer work locally. Whether it's being a Big Brother or Big Sister, helping with Habitat for Humanity, or just donating old items to the Salvation Army you're playing your own part in making things better. It's no surprise that internationally known hip hop artist Pono and world champion windsurfer Zosia Kalpacka have joined forces to give back to their hometown of Warsaw, Poland.
 The Nintendo Wii has taken America by storm since it's release a few short years ago. Nintendo has steadily made games that try to mimic many of the gestures users would use in the real world and with the release of the Balance Board (originally released with Wii Fit) they're able to better immerse the user in the experience. The latest game to utilize Nintendo's system is
  It can be difficult to break into the PWA (Professional Windsurfers Association) events that are held around the world and even more difficult to win them. That's why why we are very proud to announce that Alex Mussolini has won top honors at the PWA World Cup that was held at Sylt, Germany. He may be considered by many to be inexperienced in comparison to the large group of expert
 Windsurfing has become a international phenomenon that has taken root in countries across the world. This
  The IFCA will be holding an exciting windsurfing event that will be part of the
  The board these two men created was called a
  Check out this scan of a great article written by


 Set your screw in the middle option on the strap. Although it looks like you need more than one screw per end, all you need is one (which is why there are only 8 screws provided). Select your strap placement location, being symetrical on both sides of the board, and screw in hand tight.


 Sunset on the Sound
 Hurrincane Noel just getting warmed up